How to Disable Your Treadmill Camera and Microphone: Step-by-Step Privacy Guide
Introduction
Modern treadmills often incorporate cameras and microphones to provide interactive coaching, virtual races, and performance tracking. While these features can enhance the workout experience, they also raise legitimate privacy concerns for users who prefer to keep their personal space free from unwanted observation or audio capture. This guide explains how to identify, disable, and physically block built-in cameras and microphones on popular treadmill models, ensuring that personal data remains under your control. By following the steps below, readers will gain confidence in safeguarding their privacy without compromising the functionality of the treadmill.
In addition to technical instructions, the guide recommends affordable accessories that simplify the process and improve long‑term reliability. The recommended products are optional, but they provide a convenient way to achieve a professional‑grade result. Whether you are a home‑gym enthusiast, a fitness instructor, or a privacy‑conscious consumer, the procedures outlined here will help you maintain control over your environment.
What You'll Need
- Phillips‑head screwdriver (typically size #2)
- Soft, lint‑free cloth
- Anti‑glare screen protector (compatible with your treadmill model)
- Microphone pop‑filter or foam cover
- Adhesive‑free cleaning wipes
The screen protectors and microphone covers listed below are specifically engineered for the treadmill models discussed in this guide. They are linked for convenience, but the steps can be completed with generic equivalents if preferred.
Step 1: Locate the Camera Module
Most contemporary treadmills place the camera near the top of the console, often embedded behind a small transparent window. Begin by turning off the treadmill and unplugging it from the power source to avoid accidental activation. Use a Phillips‑head screwdriver to gently remove the console cover screws; keep them in a safe container. Once the cover is lifted, you will see a rectangular lens surrounded by a protective bezel. Document the exact position with a smartphone photo, as this will help you verify that the correct component is being addressed.
If you own a NordicTrack X24, the camera sits directly above the touchscreen, making it ideal for protection with the BoxWave NordicTrack X24 Screen Protector. This anti‑glare matte film not only reduces reflection but also adds a thin physical barrier that can deter casual visual capture. The protector costs $75.95, carries a perfect 5‑star rating, and includes a glue‑less adhesive that leaves no residue on the screen.
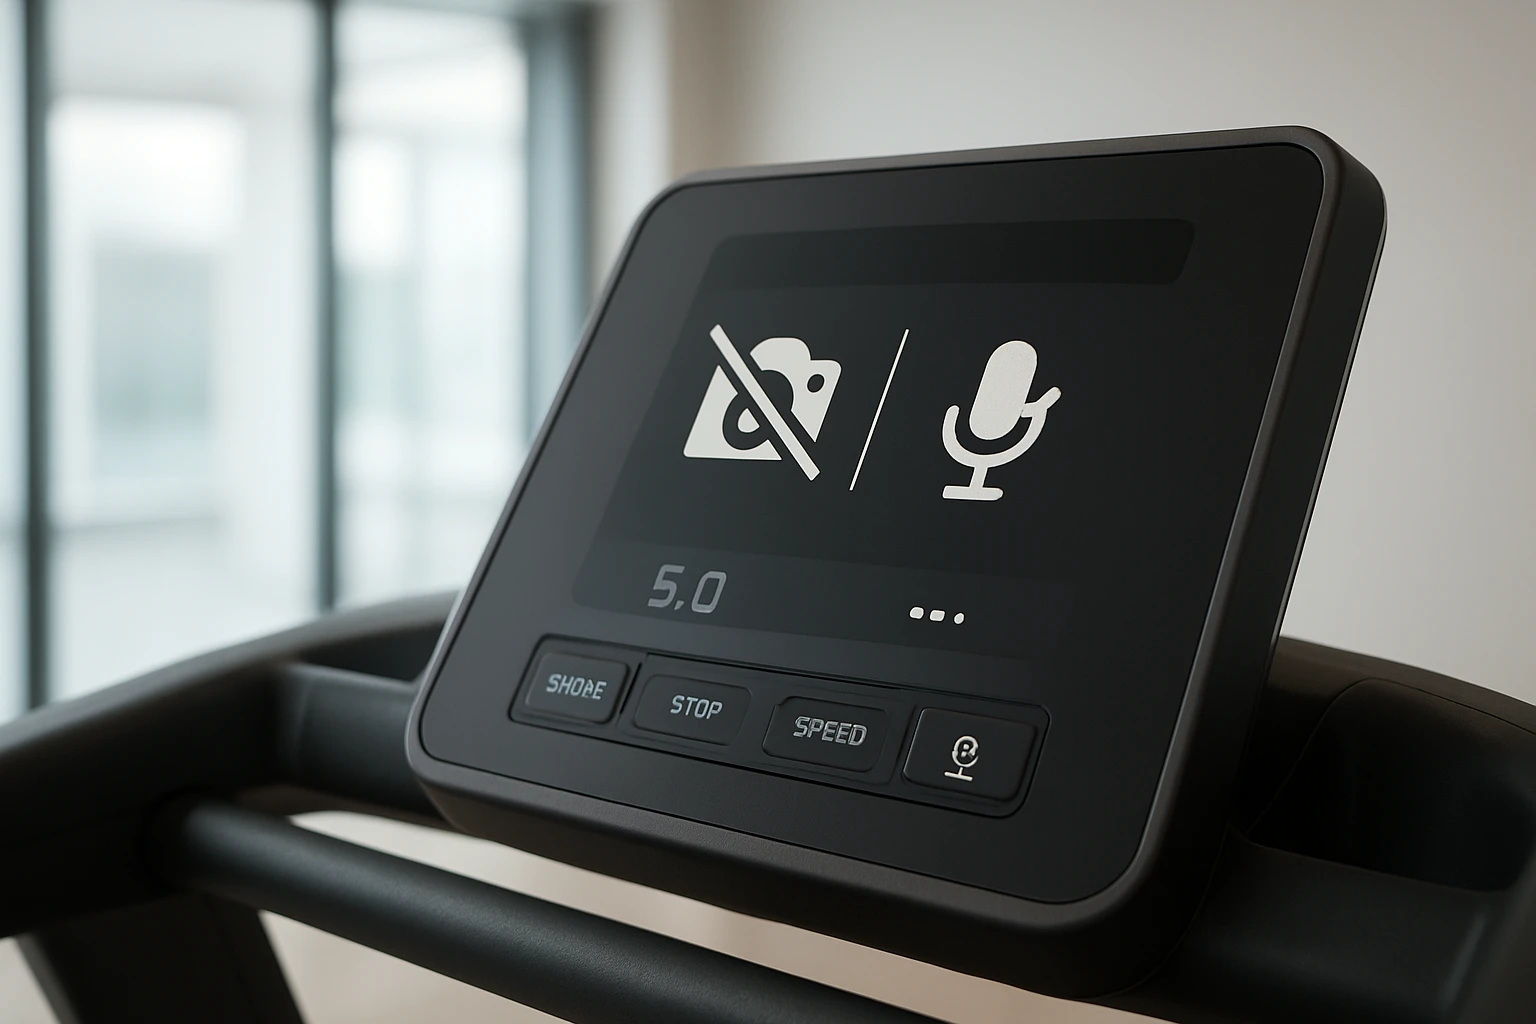
Step 2: Disable Camera Access in Software
After confirming the hardware location, power the treadmill back on and navigate to the settings menu. Look for a subsection titled "Privacy" or "Camera"; many manufacturers provide a toggle that disables the camera feed. Switch the toggle to "Off" and confirm the change. If the treadmill does not present a software option, proceed to the next step, which involves physically covering the lens.
Applying the BoxWave NordicTrack X24 Screen Protector over the entire console creates an additional layer that blocks light from reaching the camera sensor. The protector’s anti‑glare coating reduces UV exposure, protecting your eyes during intense indoor lighting, while its precision‑cut dimensions ensure that all console functions remain accessible.
Step 3: Physically Block the Camera
Even after disabling software access, a determined attacker could theoretically reactivate the camera through firmware manipulation. To mitigate this risk, apply a physical barrier directly over the lens. Use the screen protector from Step 2, aligning it carefully so that the transparent portion covers the camera window. Press gently with a lint‑free cloth to eliminate air bubbles and ensure a uniform seal.
If you own a Life Fitness RUN CX treadmill, the BoxWave Life Fitness RUN CX Screen Protector is the appropriate accessory. Priced at $19.95 and also rated 5 stars, it offers the same anti‑glare, glue‑less adhesion, and precision cut for the RUN CX console. The lower price reflects the smaller screen size, but the protective qualities remain identical.
Step 4: Locate and Disable the Microphone
The microphone is typically positioned near the bottom edge of the console, often concealed behind a small grille. As with the camera, power down the treadmill and remove the console cover to expose the microphone capsule. Some models include a dedicated mute button on the console; if present, press it and verify that the indicator light turns off.
When a mute button is absent, the most reliable solution is to attach a foam microphone cover that attenuates sound capture. The Voarmaks Mic Covers are designed for headset microphones but fit the small aperture of treadmill mics with ease. Each pack contains ten covers, costs $15.90, and holds a 4.8‑star rating based on eleven reviews. The foam material reduces plosive sounds and blocks ambient noise, effectively silencing the microphone without permanent modification.
Step 5: Reassemble and Verify
After installing the screen protector and microphone cover, replace the console cover screws and secure them tightly. Reconnect the treadmill to power and perform a quick functionality test. Verify that the touchscreen responds normally, the camera feed remains dark or disabled, and the microphone does not pick up spoken commands. If any issues arise, repeat the alignment steps for the screen protector to ensure full coverage.
Finally, document the changes in a personal log, noting the date of installation and the specific accessories used. This record will help you maintain an audit trail and simplifies future troubleshooting or resale of the equipment.
Tips & Pro Tips
- Store extra screen protector sheets in a cool, dry place; they can be swapped out if scratches develop.
- When applying the protector, work in a low‑humidity environment to prevent bubbles.
- Rotate microphone foam covers regularly to avoid wear and maintain optimal acoustic dampening.
- Consider using a privacy screen filter in addition to the anti‑glare protector for added visual obstruction.
- Keep the treadmill firmware updated; manufacturers occasionally add privacy controls that simplify disabling hardware.
Troubleshooting
Camera still shows a live feed after software disable. Re‑check the software toggle and ensure the treadmill has fully rebooted. If the feed persists, double‑check that the screen protector fully covers the lens; any exposed edge can allow light to reach the sensor.
Microphone still registers sound. Verify that the foam cover is seated snugly over the grille. If the microphone is recessed, consider adding a second layer of foam or a small piece of acoustic tape to increase attenuation.
Touchscreen responsiveness is reduced. This can occur if the screen protector is misaligned. Gently lift the protector at one corner, realign, and press firmly to restore full touch sensitivity.
Conclusion
Disabling treadmill cameras and microphones is a straightforward process that combines software settings, physical barriers, and high‑quality accessories. By following the five steps outlined above, users can protect their privacy while preserving the core functionality of their equipment. The recommended BoxWave NordicTrack X24 Screen Protector, BoxWave Life Fitness RUN CX Screen Protector, and Voarmaks Mic Covers provide reliable, non‑intrusive solutions that are easy to install and remove. Maintaining a privacy‑first mindset ensures that your home gym remains a safe and personal space.
Frequently Asked Questions
How can I locate the camera and microphone on my treadmill?
Check the user manual or look for small lenses and pinhole mics near the console, often on the display frame or side panels.
Can I disable the treadmill's camera and microphone through software settings?
Many models offer an on‑screen privacy toggle or app setting that can turn off the camera and mic without hardware changes.
What are the safest physical methods to block a treadmill camera?
Use a non‑reflective tape or a purpose‑made camera cover that adheres to the lens without damaging the surface.
Will covering the camera or unplugging the microphone affect treadmill performance?
No, blocking or disconnecting these components only disables audio/video features and does not impact core workout functions.
Are there any recommended accessories for permanently disabling treadmill cameras and microphones?
Privacy stickers, silicone microphone plugs, and removable lens caps are inexpensive accessories that provide a reliable, reversible solution.