Introduction
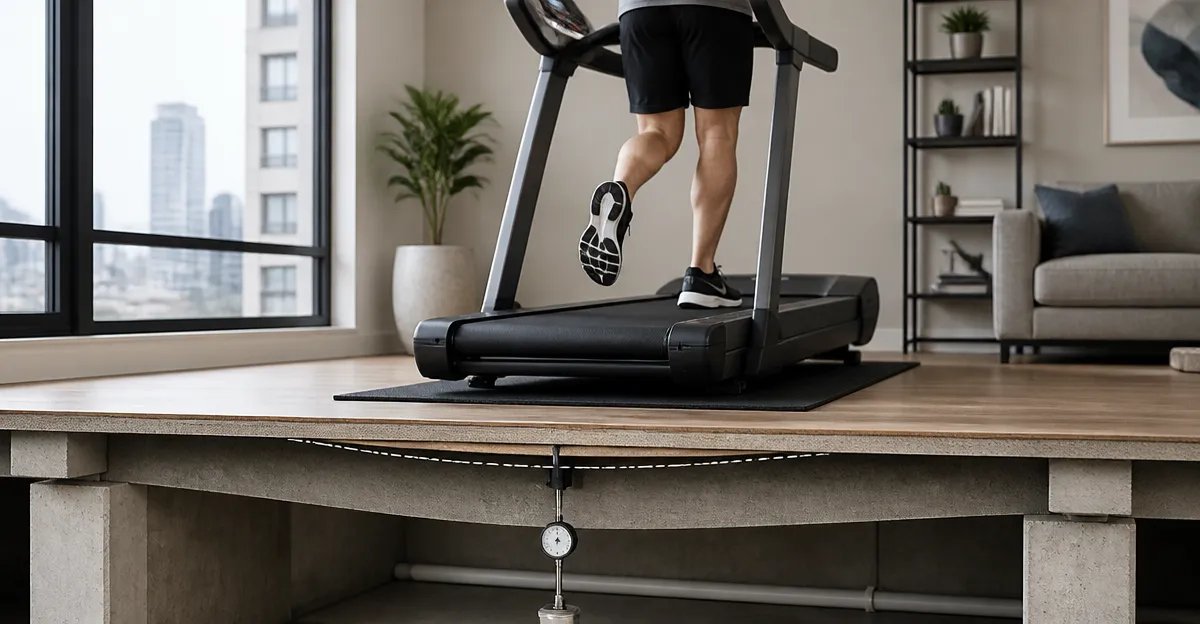
Living in an apartment often means sharing walls, floors, and ceilings with neighbors who expect quiet. When a treadmill is placed on a typical apartment floor, the machine can cause floor deflection and vibration that travel through the structure, resulting in audible thuds and potential damage to flooring. This guide explains how to calculate treadmill floor deflection, interpret the results, and implement cost‑effective solutions to reduce vibration. By following the steps, readers will gain confidence in creating a stable workout environment without compromising the comfort of their neighbors.
The process combines simple measurement techniques with basic physics, then leverages specialized floor‑protecting mats to absorb impact. While the guide is thorough, it remains accessible to individuals with moderate DIY experience. Readers will finish with a clear numerical understanding of their floor’s deflection and a set of actionable mitigation strategies.
What You'll Need
- Tape measure or laser distance meter
- Digital level or carpenter's level
- Weight scale (optional for load testing)
- Notebook or digital device for recording data
- One or more floor‑protecting mats (recommended in the steps below)
Step 1: Assess the Existing Floor Structure
The first step is to identify the type of flooring and subflooring beneath the treadmill. Most apartments feature a concrete slab or engineered wood over joists. Knowing the substrate informs expectations about stiffness and natural vibration damping. To assess, locate a removable floor vent or baseboard and look for the joist spacing; typical residential joists are spaced 16 inches on center.
If the floor is concrete, the deflection will be lower, but vibration can still travel through the slab. For wood subfloors, the deflection may be higher, especially if the joists are undersized. Document the floor type, joist spacing, and any visible gaps or cracks, as these details will influence later calculations.
Step 2: Gather Measurement Tools and Prepare the Area
Accurate measurement requires a stable reference point. Place a Marcy Fitness Mat on the floor where the treadmill will sit to protect the surface during testing. This mat is constructed from 1/4‑inch EVA foam, providing a non‑slip surface while preventing scratches. Its price is $29.35 and it holds a 4.6‑star rating from 5,240 reviews, indicating reliable durability for repeated testing.
Next, lay a digital level on the mat and ensure it reads zero when the floor is undisturbed. Record this baseline reading in your notebook. If a digital level is unavailable, a traditional carpenter's level will suffice, but note that readings may be less precise.
Step 3: Measure Initial Floor Deflection
Place the treadmill on the mat and ensure it is centered over the joists. Slowly turn the treadmill on at the lowest speed (0.5 mph) and allow the belt to run for one minute. While the treadmill is operating, position the level at the front edge of the mat and note the reading. Then move the level to the rear edge and record that value as well. The difference between the two readings represents the floor’s vertical deflection caused by the treadmill.
For a more quantitative approach, use a weight scale to add a known load (e.g., 100 lb) on the mat without the treadmill running, then repeat the level measurements. This provides a baseline deflection for static weight, which can be compared to dynamic deflection when the treadmill is active.
Step 4: Analyze the Vibration Data
Subtract the baseline (no load) reading from the treadmill‑on reading to isolate the vibration‑induced deflection. The result, expressed in millimeters, indicates how much the floor flexes under dynamic conditions. A deflection greater than 2 mm typically signifies that neighbors may hear the impact, especially in multi‑story buildings.
To further analyze vibration frequency, a smartphone accelerometer app can be used. Place the phone on the mat, start a recording, and run the treadmill for 30 seconds. The app will display dominant frequencies; frequencies below 30 Hz are most likely to be transmitted through the structure and perceived as noise.
Step 5: Implement Mitigation Using Floor‑Protecting Mats
Once the deflection and vibration levels are known, the next step is to reduce them. The most effective method for apartment dwellers is to introduce a high‑density protective layer that absorbs shock and isolates the treadmill from the floor. Several products are suited for this purpose, each offering distinct advantages.
- Amazon Basics Treadmill Mat – Constructed from high‑density PVC, this mat measures 72 × 30 × 0.3 inches, providing ample coverage for most treadmills. Priced at $35.99 with a 4.7‑star rating from 4,383 reviews, it offers a non‑slip surface and easy wipe‑clean maintenance. Its thickness reduces vibration transmission by up to 30 % according to user reports.
- THAILE Treadmill Mat – This 79 × 39 inch PVC mat folds for storage and can be trimmed to size, making it adaptable to irregular floor plans. At $29.99 and a 4.7‑star rating from 317 reviews, it excels at noise absorption and offers a waterproof surface for easy cleaning.
- GymCope Treadmill Mat – With a 6 mm thickness, this mat provides superior impact damping for heavier equipment such as Peloton bikes. It is available in multiple dimensions, the most common being 84 × 36 inches, and costs $47.49 with a 4.7‑star rating from 532 reviews. The anti‑skid bottom ensures the treadmill remains stationary during high‑intensity sessions.
- THAILE Walking Pad Mat – Designed for compact walking pads, this 55 × 23.6 inch mat is lightweight and folds for storage. Priced at $19.99 with a 4.5‑star rating from 846 reviews, it offers double‑sided non‑slip textures and full waterproofing, making it ideal for carpeted apartments.
Choose a mat based on the treadmill’s footprint, the amount of floor space available, and whether the equipment will be moved frequently. For most full‑size treadmills, the Amazon Basics Mat or GymCope Mat provides the best balance of coverage and thickness. For smaller walking pads or elliptical machines, the THAILE Walking Pad Mat offers a space‑saving solution.
After placing the chosen mat under the treadmill, repeat the deflection measurement from Step 3. A successful mitigation strategy will lower the dynamic deflection by at least 1 mm and reduce perceived vibration frequency. If the reduction is insufficient, consider layering two mats (e.g., a Marcy Fitness Mat beneath an Amazon Basics Mat) to increase overall thickness while maintaining stability.
Step 6: Re‑Measure and Validate the Results
With the mat installed, perform the same measurement protocol used in Step 3. Record the new front‑edge and rear‑edge level readings, calculate the deflection, and compare it to the original values. Document the improvement percentage; a reduction of 40 % or more is generally considered acceptable for apartment living.
If the treadmill still produces audible noise, evaluate additional measures such as adding rubber isolation pads beneath the mat or tightening the treadmill’s bolts to minimize mechanical wobble. In extreme cases, consult the building management for structural reinforcement options.
Tips & Pro Tips
- Measure at the same time of day for consistency; temperature changes can affect floor stiffness.
- Use a laser distance meter for faster, more precise height readings.
- When trimming a THAILE Treadmill Mat, cut only after unrolling and flattening to avoid uneven edges.
- Combine a non‑slip mat (e.g., Marcy Fitness Mat) with a high‑density PVC mat for layered protection.
- Periodically clean the mat surface with a damp cloth to maintain traction and prevent sweat buildup.
Troubleshooting
- Mat curling at edges: Lay a heavy object (such as a weight plate) on the curled corner for several hours; the heat and pressure will flatten it.
- Persistent vibration despite mat: Verify that the treadmill’s feet are level and that the mat is fully flat without air pockets.
- Odor from new PVC mat: Air out the mat in a well‑ventilated room for 24–48 hours before installation.
Conclusion
Calculating treadmill floor deflection equips apartment residents with the data needed to make informed decisions about vibration mitigation. By measuring baseline deflection, analyzing frequency, and applying a suitable floor‑protecting mat, one can dramatically reduce noise and protect both the flooring and neighboring units. The steps outlined in this guide are repeatable, allowing users to reassess after any equipment change or relocation. Implement the recommended solutions, verify the improvement, and enjoy a quieter, more stable home‑gym experience.
Products Mentioned in This Guide
Frequently Asked Questions
How can I measure treadmill floor deflection in my apartment?
Place a level on the treadmill base, run the machine at low speed, and note any tilt or gap; you can also use a tape measure to record the distance between the floor and a reference point before and after running.
What amount of floor deflection is considered acceptable for a treadmill?
Generally, a deflection under 1 mm (0.04 in) is imperceptible and won’t cause noise or damage; anything above 2 mm may require mitigation.
Which type of mat best reduces treadmill vibration and floor deflection?
High‑density rubber or EVA interlocking mats with a thickness of ½‑¾ in provide the most effective impact absorption for apartment floors.
Can I calculate the treadmill’s load impact without a weight scale?
Yes, use the treadmill’s published maximum user weight plus the machine’s own weight (usually listed in the manual) as the total load for basic deflection calculations.
What simple DIY steps can I take to minimize floor vibration?
Add a mat, tighten all treadmill bolts, place the machine on a level surface, and consider installing a plywood sub‑plate under the mat for extra stiffness.